JOIN THE STAMPIN' UP! FAMILY.

Whether for business or pleasure, contact me today to learn how becoming a Stampin' Up! Demonstrator can benefit you!

Monday 29 September 2008

6x6 Swap

Recently I organised a 6x6 scrapbook page swap for the INKlings demonstrator team that I am part of. I made the theme 'All About You', so everyone had to include some information about themselves - it was great fun learning abit more information about these lovely ladies, some of whom I have never met 'in real life'

I used one of my new favourite stampsets, Brocade Basics - I really can't believe I didn't like this when I first saw it!! I heat embossed the leaves on the background with white embossing powder, cut out the petals & attached with a gorgeous brad from the Styled Silver Hodgepodge. The medallion on the top left was made using silver embossing powder & the faux metal technique - lots of fun!

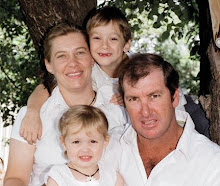
Here is abit of a closeup of the embossing & flower. The photo is so typical of my family - it is so hard to get a nice picture of everyone. Journalling reads:

'I love getting family photo's taken, but Bernie hates it! Usually he is frowning or looking grumpy, so wouldn't you know it, the one time he smiles, the kids are being FERAL!'

Stampset: Brocade Basics
Cardstock: Kraft, Pretty in Pink, Whisper White, Basic Gray
Ink: Versamark, Pretty in Pink
Accessories: White & Silver Embossing Powders, Pink Taffeta Ribbon, Stylied Silver Hodgepodge

Huge thanks to the other ladies who joined in the swap -

Dani
Lin Mei

Kari
Clare
Fiona
Ruth

Friday 26 September 2008

Spiral Punch

Firstly, a quick thanks to everyone who has been leaving me comments lately. I love comments - they mean alot to me :-)

Tegan was wondering how I made the edge on the black cardstock for my Sesame St spinners. I used the Stampin' Up! Spiral Punch - it is great for covering Stampin' Up! On Board Art Journals or other spiral notebooks, you can see a tutorial I have made here. I have also used it on the following card & scrapbook page.

Thanks so much for your question Tegan, if you would like to email me your address, I'll send you one of my spinner cards in the mail - alana@aussiebroadband.com.au

Multicoloued In Colors

I love colouring onto my stamps with Stampin' Write Markers to give a great multicoloured image, however the In Colors don't come in markers, so you need to improvise. Above are some of the things I have used to get a multicoloured image using In Colors:
Bold Stampset - I'm using Tart & Tangy
In Color Inkpad & Reinker - Wild Wasabi (I will also use Purely Pomegranite, but it's not in the picture
Blender Pens
Stampin Write Marker - I'm using Real Red
Masking Tape
Baby Wipe

The first & probably the easiest was is to ink the whole stamp in Wild Wasabi & then use a baby wipe (or cotton bud) to clean the ink off the stamp in the areas it is not wanted. I then used my Real Red Stampin' Write Marker to reink the area with the desired colour.


Another way is to make your own In Color Markers using blender pens & reinkers. You can soak the pens in a small amount of ink, which works well if you are using it straight away, however the ink does soak up the pen if left awhile. I place a drop of ink into my inkpad lid (then there is no mess to clean up) & give my blender pen a little soak in it each time I reuse it. You can then use in the same way as a marker to ink your stamp. This is great if you want to use two different In Colors to colour your image


This last one I will show you is using masking tape. I quite often use masking tape, but usually when I don't have to cut the tape into any shape. So I could cut the tape to be the right shape I placed it on my stamp & coloured over it with a pencil, this will leave a mark where the edge of the leaves are. I then cut it out & replaced on the stamp, inked the stamp in Wild Wasabi, then removed the masking tape so I could colour the rest of the image with my marker - abit fiddly, but it does work.

Do you know of different/easier way to stamp a multicoloured image using In Colors?? If so, I'd love you to leave a comment & let me know.

Tuesday 23 September 2008

Spring Mini Fun Day Invitation & tutorial

To celebrate World Card Making Day (October 4th) & the arrival of Spring I will be having a Spring Mini Fun Day on the 11th October. There will be lots of fun things to make, things to learn, prizes & giveaways - so make sure you contact me if you would like to come - alana@aussiebroadband.com.au . I will be donating $5 per attendee to the Wee Waa Hospital, along with 10% of any sales.
This is the invitation I made to send to afew of my loyal customers & friends. They were lots of fun to make & of course I forgot to take a photo of them all before sending!
I thought I'd do up a really quick tutorial to show you how they were made - enjoy :-)
Supplies:
12cm x 10cm piece of cardstock (I used Real Red in this example)
Paddle Pop Stick (again, I found some red ones to tie in with my colour theme)
Horizontal Slot Punch
Corner Rounder Punch (not pictured)
Scalloped Circle Punch
Small piece of ribbon
The other items pictured are optional, I used them to embellish the front of my paddle pop invite - Old Olive & Real Red Markers, 1 1/4" & 1 3/8" Circle Punches, Stamps (Tart & Tangy), Snail, Real Red, Wild Wasabi & Whisper White cardstock
Firstly fold your 12cm x 10cm piece of cardstock in half

In the middle of the right hand side punch 2 holes with the Horizontal Slot Punch. For the first hole I pushed the punch in as far as it would go & punched, then I moved it downwards about 1cm to make the second hole - you can see this abit better in the next picture
When making this example I forgot to round the corners - so if you wanted to, you would need to do this now. Most Stampin' Up! punches don't cut through 2 layers of cardstock very well, however the corner rounder does, so I punched mine with the invite closed, you also don't need to punch the top right hand corner.

After punching the corners, insert the paddle pop stick through the punched holes as pictured

Usind the Scalloped Circle punch out the 'bite' mark in the top of your invite. I punched out the front one first, then closed my invite & used the front as a guide to punch the back 'bite'

Tie your piece of ribbon around the paddle pop stick

Your invite is now basically complete, just print off the party details & stick on the inside & decorate the outside.

My outer embellishment was very simple - I coloured the strawberry (or apple) from Tart & Tangy with my markers & punched out with a 1 1/4" Circle & layered on a 1 3/8" Real Red Circle & Wild Wasabi Scalloped Circle
Whenever I am using my punches I always hold them upsidedown - this way I can always see exactly what I am punching. This is particularly helpful when punching out a stamped image as it allows you to make sure the image is in the centre of the punch
Stick the strawberry/apple on the font & you have a cute little invite! You can see that the invite on the right has the corners rounded & the one on the left does not.

If you were paying close attention you may have noticed that I have used Wild Wasabi cardstock & an Old Olive Marker - they don't really match, but I thought they were close enough. I have since changed my mind, so check back tomorrow & I will show you a couple of different ways to use an inkpad to create a multi coloured image.


And the winners are .........................

Australian Only Blog Candy, as drawn by RandomJosie.org

kate j
Open Slather Blog Candy, as drawn by RandomSam.org (who is allegedly home sick *rolling eyes*)

nicpiper

I will be contacting kate j & nicpiper shortly to organise delivery of your goodies. Thankyou so much to everyone who entered, it was especially great to see so many of my local girls joining in & commenting :-)

Friday 19 September 2008

Sesame Street Spinners

Lin Mei's 2nd challenge for the INKling cyberstamp was to make a spinner card. They are really fun - when you tilt the card to the side the image spins all the way across the card - if you click here you can see the tutorial I followed & if you are in Australia you can substitute the penny for 5 cents.
I immediately thought of a spinning flower or butterfly, but then thought that others probably had the same thought (are you still with me?), so wanted to do something different. I then remembered seeing some cute little Sesame Street punchies around the blogosphere lately & decided Elmo would be great at spinning!


This is so different to the cards I have been making lately, but was heaps of fun & the kids loved it, so I decided to make Elmo some friends.


I think Oscar the Grouch is my favourite, but have just thought (oh no not again!!) that I need the Bugs & Kisses stamp set to make is little friend Slimey!

Stampset: It's Your Birthday
Cardstock: Real Red, Basic Black, Whisper White, Summer Sun, Old Olive, Night of Navy, Basic Gray, Pumpkin Pie, Close to Cocoa, Choc Chip, Pretty in Pink, Summer Picnic DSP
Ink: Basic Black
Punches: Scalloped Circle, 1 1/4" Circle, 1/2" Circle, Small Oval, Horizontal Slot, Spiral, Word Window

Thursday 18 September 2008

INKlings Cyberstamp

Monday night was our team cyberstamp which was hosted this month by the very talented & funny Lin Mei. If you have the chance to check out her blog please do - Lin Mei has a hilarious sense of humour & her posts always give me a giggle.


First up was a colour challenge - Basic Black, Almost Amethyst, Chocolate Chip, Whisper White & abit of Silver. I had a hard time adding black & had to settle for the stamped image & sentiment being the only black used!


I was feeling abit challenged, so CASEd the layout for this card from the current Stampin' Up! Idea Book & Catalogue - page 41. I find the catalogue a constant source of inspiration for layouts, colour combinations & embellishment ideas. If you would like a copy for FREE, then send me an email - alana@aussiebroadband.com.au I will give one away to the first 3 people who email me!

Here is a close up of the paper piercing & the cute little owl popped up on dimensionals. I coloured the image in with an aquapainter & inkpad & although it is not particularly good it still looks OK

Stampset: Celebrate Everyday
Cardstock: Almost Amethyst, Choc Chip, Amethyst DSP
Inks: Basic Black, Choc Chip
Accessories: White Grosgrain Ribbon, Silver Cord (retired), Aquapainter, Mat Pack & Paper Piercer

I will post the 2nd card I made for the cyberstamp tomorrow. If you don't already look at Carol's blog, make sure you head over there to check out the creative way she used the same little owl from Celebrate Everyday - very clever Carol :-)

Australian Only Blog Candy

WOW - what a difference one year can make! Just over 12 months ago I made the decision to join Stampin' Up! as an Independent Demonstrator & it has been one of the best things I have ever done. I have made some lovely friends & learned so much about papercraft & stamping, been published & I also started this blog. I never thought that many people would be interested in looking at what I made, but soon this blog will have had 20,000 hits!!! As a thankyou to my loyal visitors I am offering up the following blog candy:

New unmounted Merci stampset - as used for my recently published cards here
Handmade bookmark
3x3 notecards & co-ordinating box

Only one entry per person & once comments reach 15 I will add extra goodies & keep adding extra for every additional 5 comments. Sadly I have had trouble posting things overseas in the past, so this candy is only open to Australian residents - however overseas visitors can enter in my 'Open Slather Blog Candy". To be in the running to win, leave me a comment on this post before 10am AEST Tuesday telling me what your favourite Stampin' Up! stampset is!

Open Slather Blog Candy

Want to win a set of cards that will be featured in an upcoming magazine publication? All you need to do is leave a comment on this post telling me where you first saw/learned/heard about my blog. The cards are top secret, so I can't even show you pictures of them. I will draw a random winner on Tuesday 23rd Sept 10am AEST.

Thursday 11 September 2008

Colour Challenged

I wasn't going to participate in Kristina's latest colour challenge, but like a true addict, I couldn't resist. This weeks colours are Soft Sky, Bravo Burgandy, Rose Red, Regal Rose & Whisper White - I love using Rose Red & Regal Rose together, however I'm not to sure about the final result!


I have realised that the sentiment is crooked, but there is something else not quite 'right' - I think maybe there is too much white compared to my usual cards!

Stampsets: Brocade Basics, It's Your Birthday
Cardstock: Soft Sky, Regal Rose, Rose Red, Whisper White
Inks: Regal Rose, Soft Sky
Accessories: Burgandy Grosgrain, Styled Silver Hodgepodge, Beads from Pretties Kit, Designer Label Punch, Markers - Regal Rose, Rose Red, Bravo Burgandy

Don't forget to check back soon for more details on my BLOG CANDY :-)

I'M PUBLISHED ........

...& I'm just so excited about it I can't stop smiling! If you would like to check out my cards, along with full instructions on how to make them, then be sure you grab a copy of Australian Stamping & Papercraft magazine - it is available in all good newsagents from tomorrow ;-)

My cards now have pride of place on my bookshelf for the time being - the other great thing is that the publisher has, just today, agreed to publish some more cards of mine, so readers of this magazine can look forward to seeing more of me in the future.

I have a spare one of these stampsets & was going to try & sell it, but I think I will offer it up as blog candy - so check back soon for more details on how you can win!

Tuesday 9 September 2008

Faux Stitching ATC's

I made these ATC's last month for our INKlings team ATC swap. The theme was Faux Stitching, which I love - I can't sew to save myself, but luckily I can Faux Sew!!! It is quite easy to do, especially if you have a Stampin' Up! Mat Pack (if anyone wants me to pop up a picture of one, just send me an email - alana@aussiebroadband.com.au) All you need to do is pierce a line of holes, then join them up with either a gel pen or marker - I have used a Chocolate Chip Stampin' Write Marker for my stitching.

Stampset: True Friend
Cardstock: Choc Chip, Blue Bayou, Soft Sky, Fall Flowers DSP
Ink: Choc Chip, Blue Bayou, Wild Wasabi
Accessories: Antique Brass Brad, Blender Pens, Choc Chip Stampin' Write Marker, Mat Pack & Paper Piercer
If you would like one of these ATC's then consider joining my ATC swap. It is open to anyone in Australia - you don't need to be a Stampin' Up Demonstrator, although I would prefer if you tried to use Stampin' Up! products. My current swap theme is 'Brads', send 5 ATC's along with a stamped, self addressed envelope to me by 30th Sept & I will send 5 different ATC's back to you. My address is:
Alana Galagher
PO Box 205
Wee Waa NSW 2388

Sunday 7 September 2008

New family member & afew cards....

Not a new baby, just the next best thing - we've got a new puppy. Well at the moment it is puppies, but we will only be keeping one - the other two are just 'visiting' until we can find them a home.
The kids named ours Megsy (she's the one on the left) & are having lots of fun playing with them - although they have already started chewing everything, including the shoes & poor Josie's hair!Went outside looking for Sam yesterday & this is where I found him - I don't think he was really asleep, but he was doing a pretty good acting job!

Anyway - on to a couple of cards, they use the new Die Cut Blooms from the Spring Mini Catalogue & were the easiest cards to make - I even used rub ons for the sentiments, so not a stamp in sight!!!!!


The Die Cut Blooms come in a pack of 4 sheets of 12x12 textured cardstock . There is one sheet each of Pumplin Pie, Old Olive, Bashful Blue & Real Red blooms with over 35 individual flowers & circle centres.

Friday 5 September 2008

Congratulations .....

My nephew announced his engagement afew weeks ago & we are so happy for him. The lovely couple, Matt & Jodie, are both horse crazy so when I saw this card I just had to CASE it. It's abit of a weird size - 4"x8", but still fits in a DL envelope - now I just need to remember to send it to them!

It's been raining almost all week here which is fantastic as we need it so badly - the only down side is that my pics look even worse than normal (& they are normally pretty ordinary!)


Stampset: Wanted, Circle of Friendship, Sanded Background
Cardstock: Choc Chip, Naturals Ivory, Textured Close to Cocoa, Outlaw DSP
Inks: Choc Chip, Creamy Caramel
Accessories: Antique Brass Brad, Wide Choc Grosgrain

Thursday 4 September 2008

Kristina Werner Inspiration Challenge #21

Last week I ran out of time & couldn't participate in Kristina's challenge, so had to make an extra special effort this week to make sure I could join in the fun.

Above is this weeks inspiration picture with the colours we are to use. We don't have Kiwi Kiss & Pacific Point here Down Under (they will be here in April!) so Kristina suggested we replace them with Old Olive & Tempting Turquoise - I don't have any Tempting Turquoise :-( so had to use Blue Bayou. It's abit darker, but still looks OK.
The pic is abit glary as it's raining here today & I've also just realised my sentiment is crooked - oops!! I am sending this card to a friend of mine who is in need of a few 'hugs & kisses', but lives to far away for me to give them to her in person, so hopefully this card will brighten her day.
So sorry - I've had to remove this card for publication :-)

Wednesday 3 September 2008

Spring Mini Catty CASE

A few weeks ago my Stampin' Up! upline, Jayne, issued us a challenge to CASE a specific card from the Spring Mini Catalogue & send one to a fellow INKling teammate. You can see in the picture below the card we were to CASE (bottom right of page), my card in the middle & the lovely card I received from Kari on the left. It has been fun to see how different everyone's cards are even when we all used the same layout.
Here is a closeup of mine - I decided to use all In Colors along with my rarely used Office Accoutrement stampset. I also broke out & used the paper crimer for the first time & it was so much fun so think I could become addicted to using it!

Stampsets: Office Accoutrement, Fabulous Flowers, So Many Sayings
Cardstock: River Rock, Wild Wasabi, Groovy Guava, Purely Pomegranite, Blue Bayou, Soft Sky, Whisper White
Ink: Blue Bayou, Purely Pomegranite
Accessories: Guava Double Stitched Grosgrain, Paper Crimper, Antique Brass Brad

Monday 1 September 2008

Stampin' Up! FREE Wheelin' Promotion


Buy any of the following stamp sets during September you will receive the co-ordinating Jumbo Stampin’ Around Wheel for FREE!

Merry, Merry pg 29 - get the All About Christmas jumbo wheel FREE
Artfully Asian pg 48 - get the Watercolor Vine jumbo wheel FREE
Nursery Necessities pg 59 - get the Nursery Letters jumbo wheel FREE
Bodacious Bouquet pg 80 - get the Bodacious jumbo wheel FREE
Carte Postale pg 94 - get the Leaves a la Carte jumbo wheel FREE
Priceless pg 105 - get the So Swirly jumbo wheel for FREE

Here are a couple of older samples of mine that use the Carte Postale stamp set & the co-ordinating Leaves a la Carte jumbo wheel


Don't miss out on this wheely good deal - contact me today!!

Alana Galagher

alana@aussiebroadband.com.au

0428 964360